
In this guide we will learn how to setup loki and promtail in seperate containers. We will also configure loki and promtail to collect log files of /var/log/ directory. Then we will use grafana to get logs from loki and display logs in an easily accessible dashboard.
Log monitoring using promtail and loki can help us to know about various activities that is happening in a system or application. It can help us to find the cause of errors and hence save a lot of our time while debugging. Logs should be made accessible to developers for debugging and if we want developers to have access to logs without giving them access to servers then this guide is a really effective way to setup log monitoring.
If you read my previous blog, we learnt how to setup mysqld_exporter in ubuntu server for MySQL database monitoring. Now, we will setup Loki and promtail in a container which will basically collect all our logs and store them. Also we need to setup promtail in our server for Loki to work.
Promtail is an agent which scrapes logs from server and sends the logs to loki. It is usually deployed to every machine that has applications needed to be monitored. Then the logs collected by loki is displayed in grafana dasboard. We dont need to configure anything in prometheus.
In my previous blogs i had setup node_exporter, cAdvisor, mysqld_exporter in the same server. In this case too we will learn how to setup loki and promtail in the same server.
So lets add extra configs in our docker-compose.yml file that we have created in my previous blogs.
Add this extra volume:
volumes:
  loki-data:
    driver: local
You conifg should look like this:

Also add settings for loki and promtail:
loki:
    image: grafana/loki:2.5.0
    container_name: loki
    ports:
      - "3100:3100"
    volumes:
      - loki-data:/loki
      - "./loki/config:/etc/loki"
    command: -config.file=/etc/loki/local-config.yaml
    restart: unless-stopped
    networks:
      - prometheus-network
  promtail:
    image: grafana/promtail:2.5.0
    container_name: promtail
    volumes:
      - "./promtail/config:/etc/promtail"
      - /var/log:/var/log
      - /home/ubuntu:/home/ubuntu
    command: -config.file=/etc/promtail/config.yml
    restart: unless-stopped
    networks:
      - prometheus-network
Your config should look like this:

Now just build the containers by using this command:
sudo docker-compose up --build -d

Now you should be able to see 2 extra folders loki and promtail. This is where we will add extra config files for promtail.
First lets add config file for loki.
sudo nano loki/config/local-config.yaml
Now add this config in the local-config.yaml file:
auth_enabled: false
server:
  http_listen_port: 3100
common:
  path_prefix: /loki
  storage:
    filesystem:
      chunks_directory: /loki/chunks
      rules_directory: /loki/rules
  replication_factor: 1
  ring:
    kvstore:
      store: inmemory
schema_config:
  configs:
    - from: 2020-10-24
      store: boltdb-shipper
      object_store: filesystem
      schema: v11
      index:
        prefix: index_
        period: 24h
It should look like this:

Now we are going to add config file for promtail. Here we will configure address of loki to send our logs, jobname, labels for each job and folder to scan for logs.
sudo nano promtail/config/config.yml
server:
  http_listen_port: 9080
  grpc_listen_port: 0
positions:
  filename: /tmp/positions.yaml
clients:
  - url: http://loki:3100/loki/api/v1/push
scrape_configs:
  - job_name: prometheus-system
    static_configs:
    - targets:
        - localhost
      labels:
        job: prometheus-varlogs
        __path__: /var/log/*log
Our config file should look like this:

In our above config file, all we need to know is the client section and scrape_config section for now.
We have set the client url: http://loki:3100/loki/api/v1/push
It means that promtail will push the log data to our loki api. Here the above url is only working because the container name of loki is loki and promtail is in the same network as of loki.
The scrape_config section is for adding location of log files and job names.
Job_name is simply a name which can be set to whatever u want.
And in labels section we have “job” whose name is displayed in grafana. Set it properly as this is important for classifying out log files. I will show this in grafana later.
__path__ is set to /var/log/ directory and it will include all files whose names end with log.
Now lets restart our docker-containers and check containers
sudo docker-compose restart
sudo docker-compose ps

Looks like everything is running fine.
Now its time to add Loki as a datasource in grafana.
Login to your grafana. If u are confused check my previous blog.
Goto settings and click on data sources:

Now Enter url and click on save and test:


Now lets browse for our log files and add them on a dasboard.
Go to explore and select loki.
Also make sure u have selected on code as shown in screenshot below:

Now click on log browser and click on the jobname that we had specified in our promtail config file.
It will display all the files that falls under the jobname.

Here we can see three files; syslog, auth.log and kern.log All of these file names end with log.
Similarly we can add other job names and location of other folders in our promtail config file under scrape_config section. This will help to monitor other log files as per our need.
Now, lets check the log and add it to our dashboard.
Simply click on a filename and then show logs:

Now we can see the content of syslog:

We can change the time of log as per our need and also check logs in love mode.
Lets add it to a dashboard:
Click on add to dasboard, select new dasbhoard and then open in new tab:

Then a panel will appear. You can press E to edit the panel and give a name.
Also lets add a new row and give it a name.

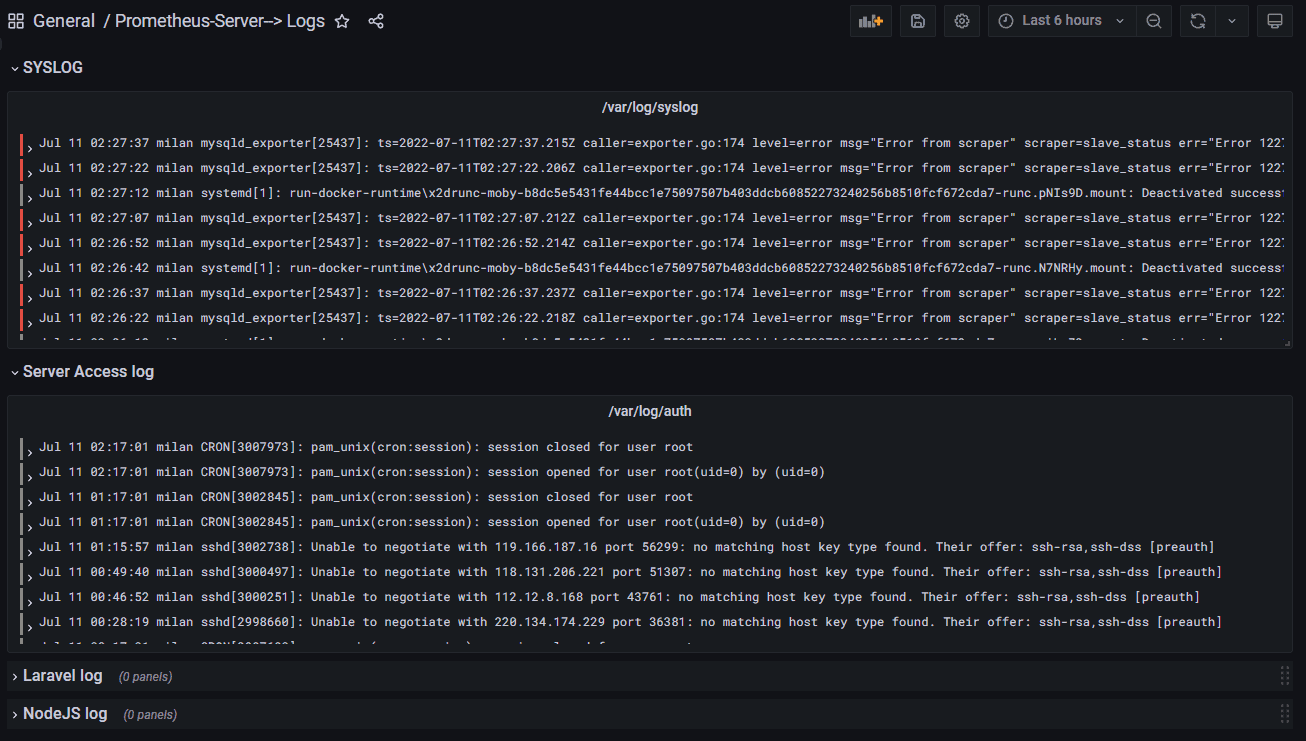
My final dashboard looks like this now:

I have changed the dashboard name and saved in general folder. You can explore and tweak around with many options.
Thats it !! This should give you basic idea to add dashboard for log monitoring in grafana.
In my next blog i will teach you how to configure basic email alert system in grafana.
Sign up to stay updated with the latest insights, news, and more.