
In this guide we will learn to configure vault approle authentication method, enable KV engine, create vault policy and create a role which can be used by our vault app to get credentials from KV engine.
While developing applications we often face situations where we have to use credentials in our code so that our application can access the required resources. Credentails are sensitive and need to be hidden from unauthorized people and even every developers should not have access to these credentials.
Hence, normally we don’t write the credentials in our code directly but store it seperately. For example, we can use .env files to store our credentials and prevent credentials from being seen in the code.
However, .env files are not completely secure and managing credentials is difficult in a large organization. This is where vault can be used to not only store credentials securely but also help with credentials rotation, credential revocation and centralized management of credentials.
In this guide we will integrate vault with NodeJS to pull credentials stored in vault. I will show you how to store credentials in KV (Key-Value) engine of vault and then use node-vault package in NodeJS to authenticate with vault and then pull the credential from KV engine.
Before we begin, we need to understand at least one of the authentication methods of vault. These authentication methods are used by our application to authenticate with vault. There are various authentication methods in vault which you can see below.
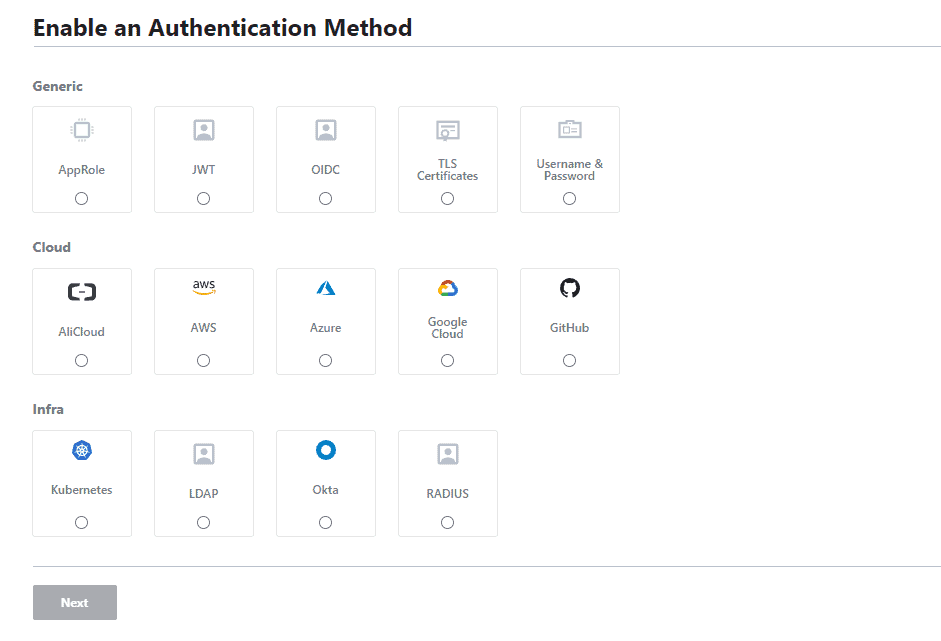
Usually for applications, approle is the best way for authentication with vault. It is the most generic method which uses roleID and secrectID for authentication.
And for additional security measure i will also guide you to bind your IP address to approle so that only people with specific IP are authorized. Hence, even if our roleid and secretid is leaked, they won’t be able to authenticate with vault.
Lets begin by creating approle for authentication. But before we begin make sure that:
Sign in to vault using root token.
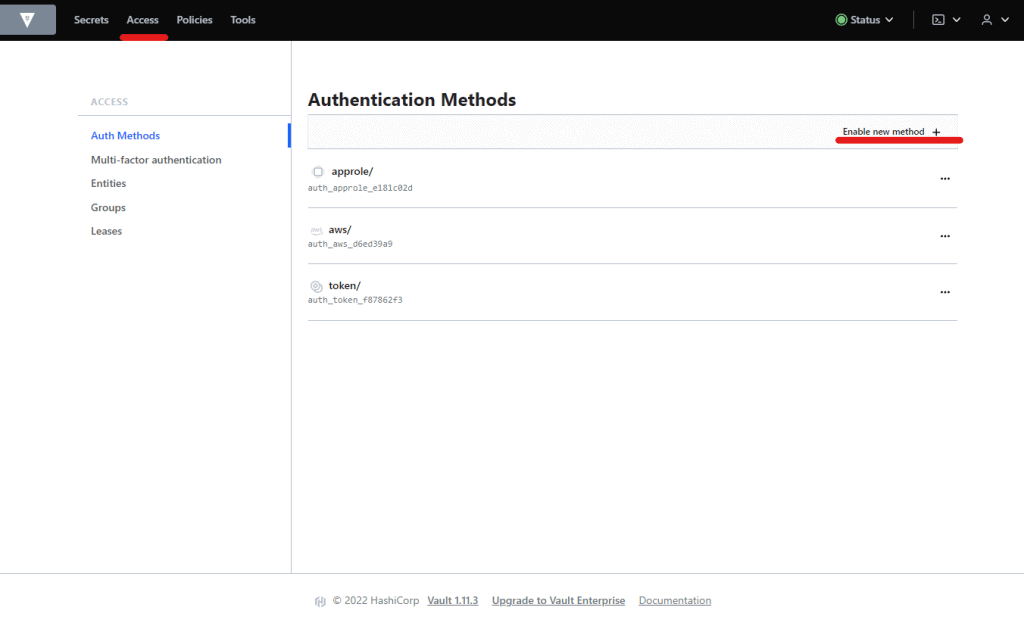
Go to access section and click on enable new method.
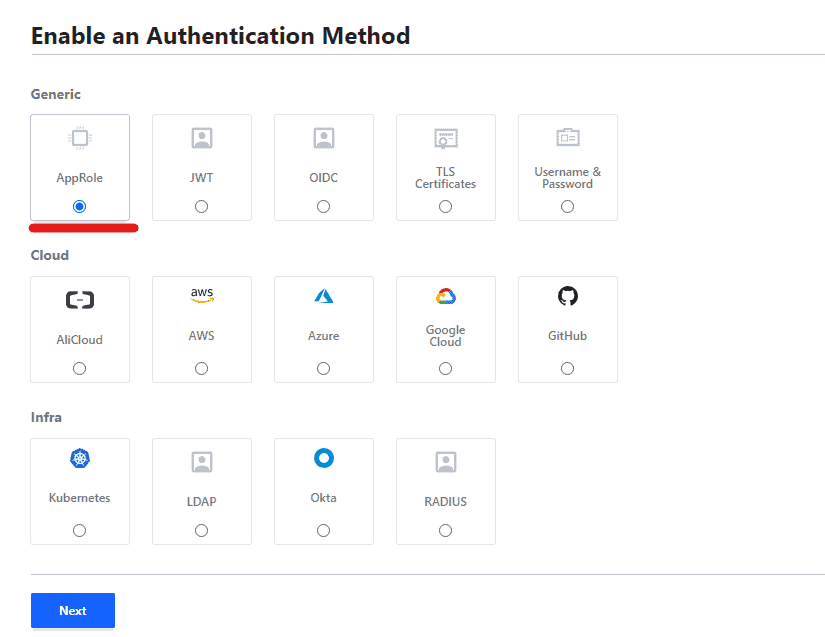
Select Approle and click on next.
Give a path for approle and enable method.
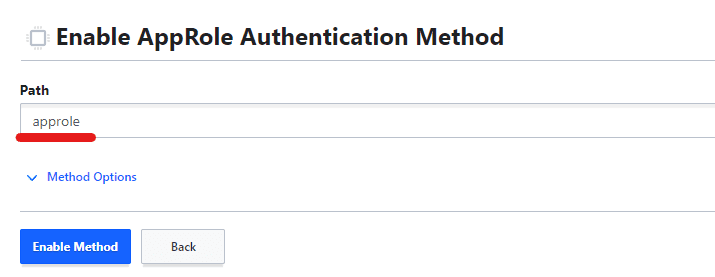

Now don’t modify anything and simply click on update options.
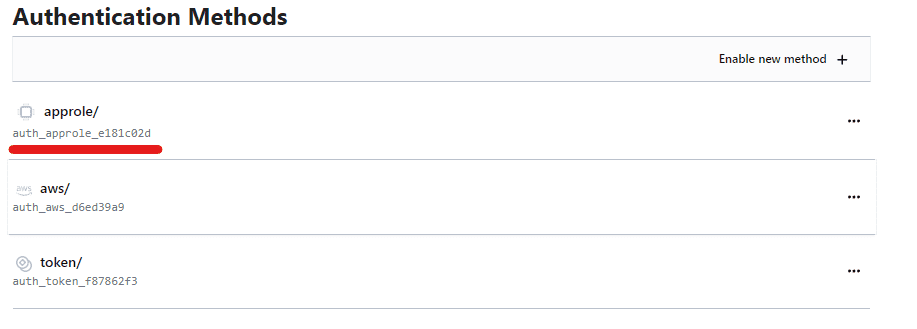
Now you should be able to see it.

After AppRole is enabled, we need to create a role.
A role is like a user who has access to various paths depending on the policy given to it.
So, now we need to create a demo key-value
credential, then create a role and make a policy which gives our role access to that key-value credential.
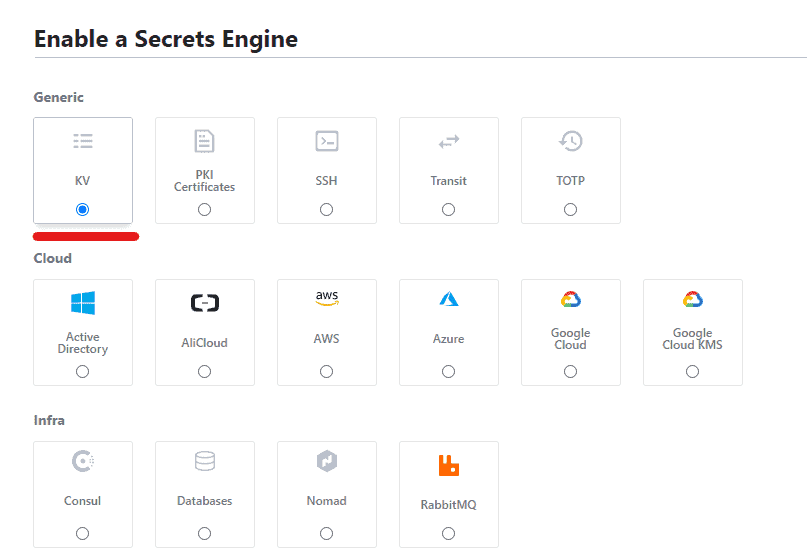
Go to secret and click on enable new engine.

Select KV and click next.
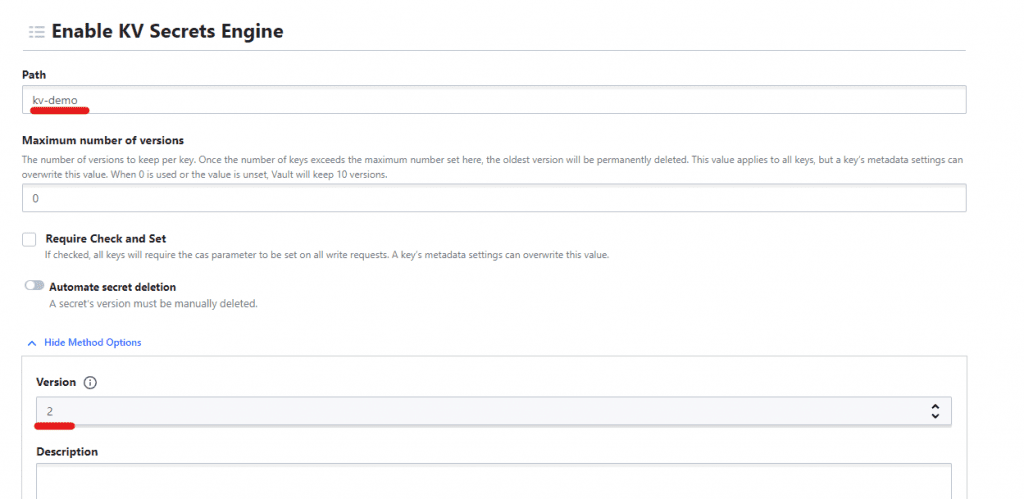
Give a path for KV and make sure that the KV version is 2.
Leave everything else to default and enable engine.
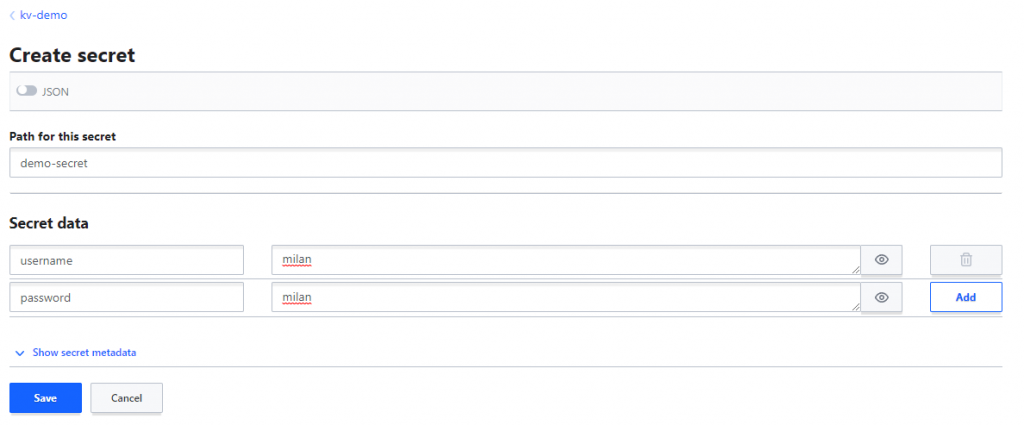
Now click on create secret.

Give a path. You can think of path as folder name.
And enter some key value data like shown below and save.
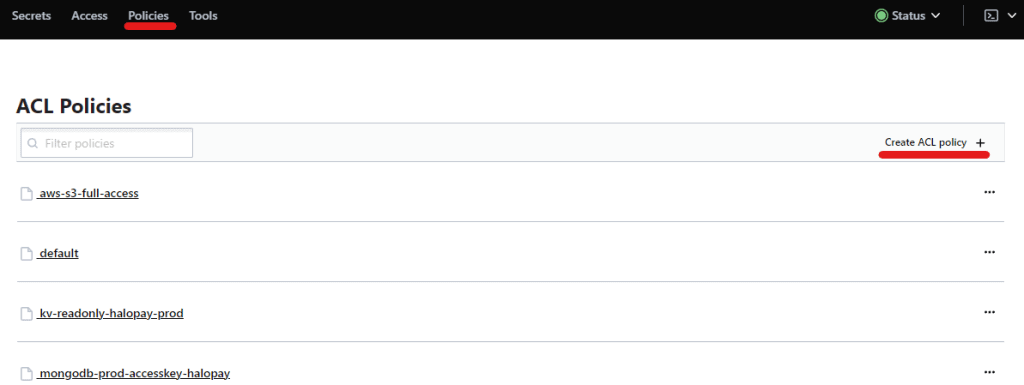
Now we need to define a policy which has access to our key-value credential. Then we will attach this policy to the role that we created earlier.
Go to policy and click create ACL policy.
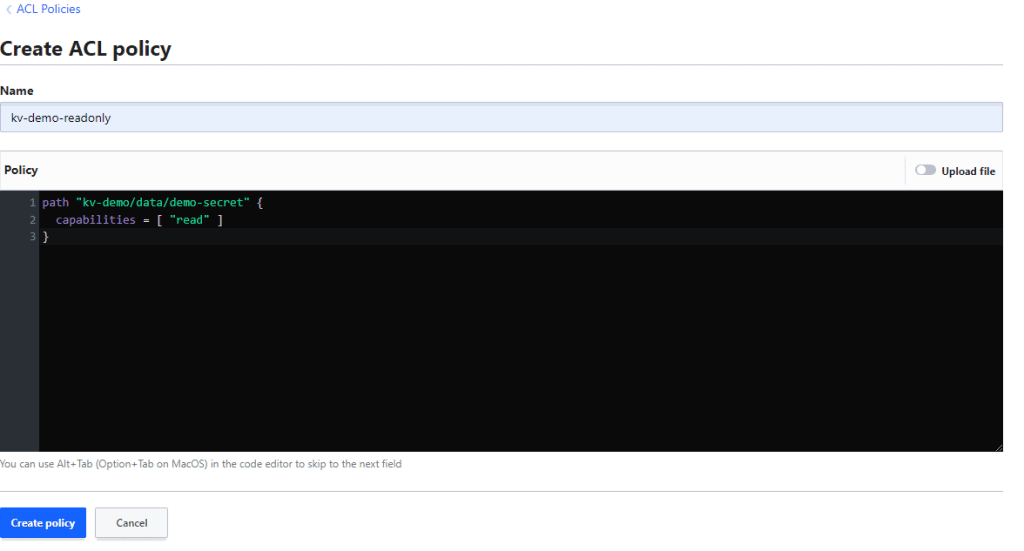
Give a name for policy and add the following in Policy section:
path "kv-demo/data/demo-secret" {
  capabilities = [ "read" ]
}
Here we have given path of our key-value credential and give permission to read only. You can add more permission as required.
The path was defined by us earlier.
We just need to add data in the path since we are using KV v2.

For this we are going to access our vault server via SSH and use vault cli for creating role.
You can also setup vault cli in your local system, configure vault url and use root token to access vault.
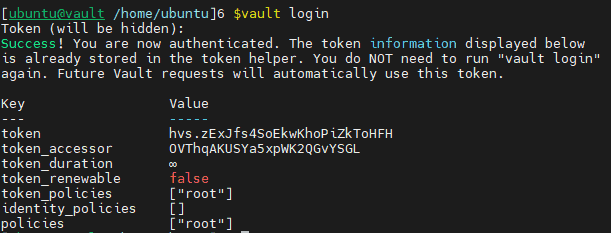
Login using your root token:
vault login
Now use the following command to create a new role.
vault write auth/approle/role/demo-role \
      secret_id_bound_cidrs="0.0.0.0/0" \
      secret_id_ttl=720h \
      secret_id_num_uses=5000 \
      token_bound_cidrs="0.0.0.0/0" \
      token_num_uses=5000\
      token_ttl=720h \
      token_max_ttl=720h \
      token_policies="kv-demo-readonly"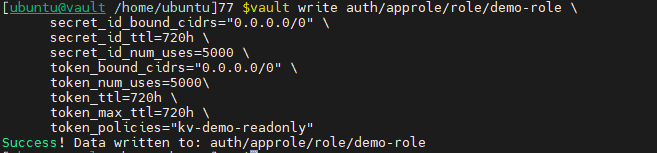
In the above command we have the following:
secret_id_bound_cidrs: It is simply the IP address who can use this role. In my case anyone can use it. Configure it as needed by you.
secret_id_ttl : It is time period after which credentials generated from this role will be expired. In my case if i generate credentials using this role then it will expire after 30 days and cannot be used.
secret_id_num_uses: It defines how many times the credentials generated using this role can be used.
Token: Tokens are acquired after we use secret_id (and roleID) to authenticate with vault. This token is used to pull credentials from vault. i.e. KV in our case right now.
Token_policy: Here we have used kv-demo-readonly that we created earlier. This mean anyone who has this token can read our KV data we created earlier.
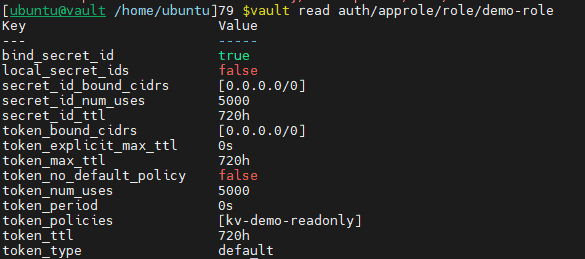
Now lets confirm whether our role is there or not.
vault read auth/approle/role/demo-role
Now we need to acquire secretID and Role ID using this role.
We can roleID simply by using this command:
vault read auth/approle/role/demo-role/role-id

Here we can see our role_id.
Similarly we can get secretID:
vault write -f auth/approle/role/demo-role/secret-id

We also have our secret ID.
Lets acquire token using this command.
vault write auth/approle/login role_id=Your_roleID secret_id=Your_secretID

Now we have acquired token and we can see this token has policy kv-demo-readonly.
If we login to vault using this token, then we can only access our kv we created earlier.
Lets check it:
vault login
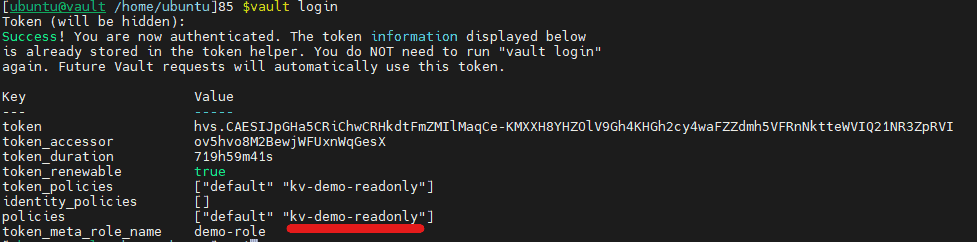
We can see that we have kv-demo-readonly policy attached to us.
Now lets try to read KV that we created earlier.
vault kv get kv-demo/demo-secret
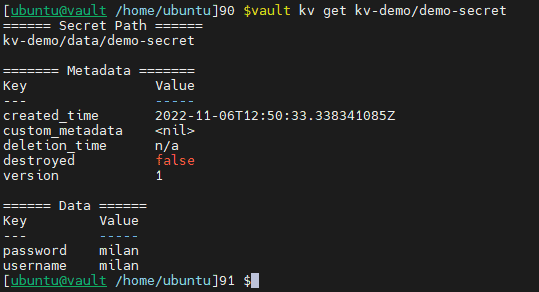
Here we can see the key value data that we stored in vault KV engine. In part 2, we will use node-vault package in NodeJS to get this same credential.
Sign up to stay updated with the latest insights, news, and more.